How to Upload WordPress plugin on wordpress.org in Ubuntu/Linux

If you are running Ubuntu and you don’t have any idea about how to upload or update the WordPress plugins on wordpress.org so you on the right page here is a complete guide on how you can upload any plugin on wordpress.org.
There is a software “RapidSVN-snap” available in Ubuntu software. You can use this software for download, upload and managing tags for your wordpress plugins.
About RapidSVN
RapidSVN is a cross-platform GUI front-end for the Subversion revision system written in C++ using the wxWidgets framework. This project also includes a Subversion client C++ API.
RapidSVN is licensed under the GNU GENERAL PUBLIC LICENSE v3.
Features
- Simple – provides an easy to use interface for Subversion features
- Efficient – simple for beginners but flexible enough to increase productivity for experienced Subversion users
- Portable – runs on any platform on which Subversion and wxWidgets can run: Linux, Windows, Mac OS/X, Solaris, etc.
- Fast – entirely written in C++
Step 1. Install Rapid SVN
The first thing you need to install is Rapid SVN software in your machine, you can easily get this by searching “RapidSVN” in Ubuntu Software which is available for free in Ubuntu store.

Step 2. Open Rapid SVN
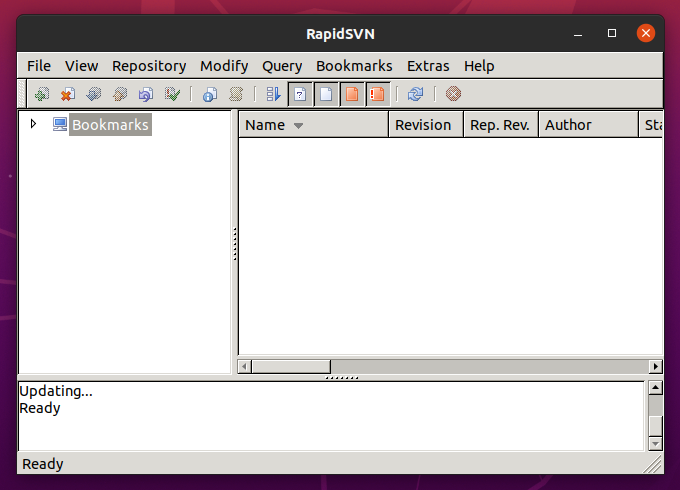
After installing the Rapid SVN, Open it from all applications, the application will open with a simple GUI interface on your screen. On the left-hand side, you can see all your bookmarks or the repositories which are connected to your RapidSVN.
Step 3. Clone WP Plugin SVN Repository
In the above toolbar there is a menu Repository it has some menus under it like import, export, checkout, create, and merge repository. In our case, we will use Checkout menu. By using that option you can clone the wordpress plugin svn repository into your system.

When you click on it a dialog will appear on your screen which requires your repository URL and a destination path where this repository should be copied, you can paste your plugin SVN repository link in the URL and your folder path in the destination field.
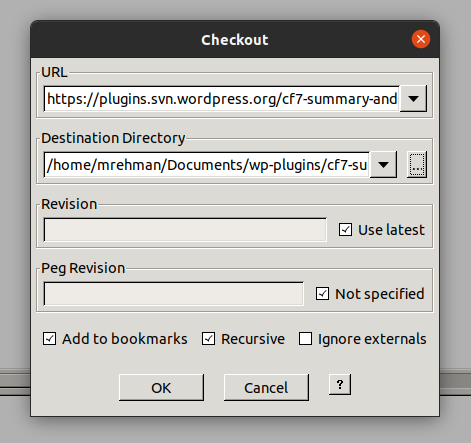
Click OK, and then the repository will clone to your system directory.
Step 4. Upload Your Plugin Data
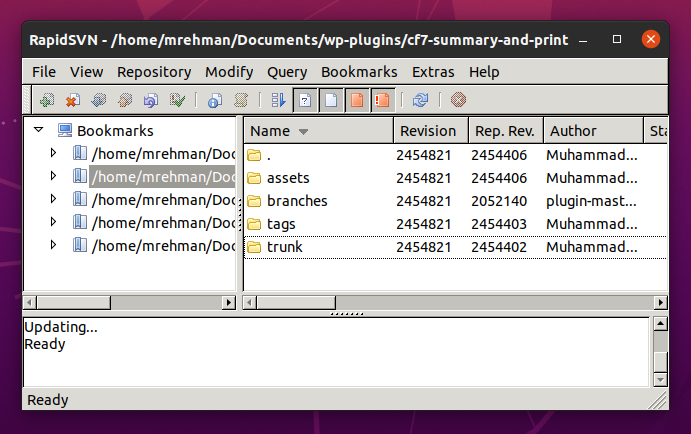
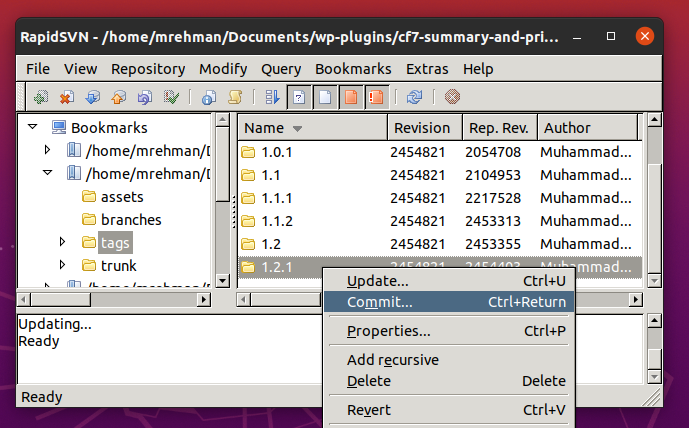
Go to the destination folder from your system and paste all the plugin’s folders & files into the trunk folder then open again RapidSVN select trunk folder and right-click on it you will see multiple options click on “Add recursive” then right-click again on the trunk folder and this time you need to click on “commit”.

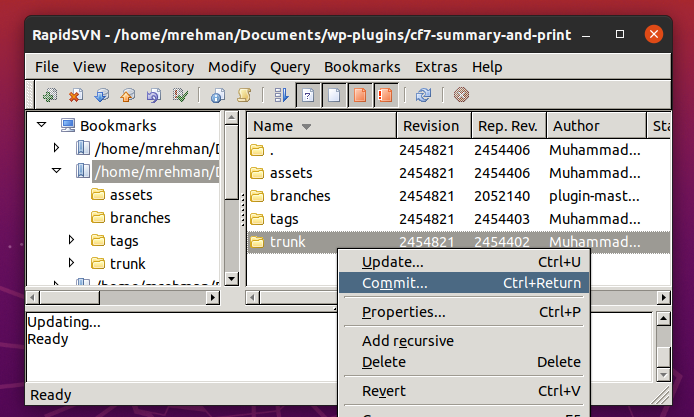
Once you do this It will ask for the username and password for the wordpress.org account add your WordPress account details and press OK button, Now your plugin will upload on wordpress.org.
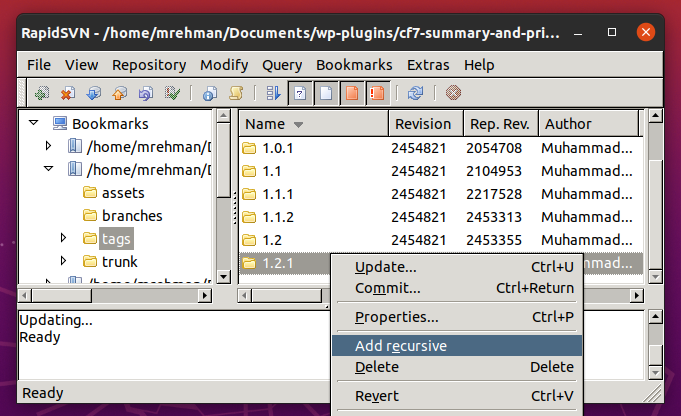
Step 5. Add Your Plugin Tags
After the trunk update, you need to create a tag for your plugin. you can do this simply by going to the tags folder add a new folder with the name of your current plugin version like “1.0” but in my case, I am adding “1.2.1” because I am using the old repository in this example, and if you’re releasing an update of your plugin instead of pushing new so the steps will be same.
Now paste your plugin folders and files in this directory too as you did for trunk. and then the same process applied open RapidSVN double click on tags select your version right click on it click on “Add recursive” then right click again and click on “commit”. Now the tags are updated as well.
Your Plugin has Successfully Uploaded / Updated on WordPress
Please leave your feedback in the comments section below how much this guide helpful to you, and if you have any questions you can also ask in the comments.
it helps me a lot thanks